Padding/rats is a process the Elizabethans used to make it seem like they had more hair and it was a way of making it appear thicker and give the hair more height. We still use this technique today although we do it slightly different as Elizabethans would use real hair to create the padding where as now we use tights and tissue to make it.
Heart shaped hair is iconic for the Elizabethan era so I feel it's important to know how to create them. For this I crimped the hair first to add thickness and more texture and used padding to add to the heart shape, the padding was tricky to use at first but using a plat as the base to pin the padding in made it easier, I feel the right side turned out better and coverd the padding better

To make the arch I curled the hair over using my fingers then pinned it down to secure it more I think that the crimped hair was more effective with the look as a whole.
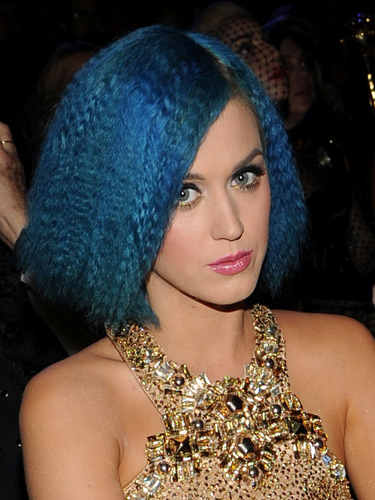
The Chanel cat walk inspires me on how to turn Elizabethan hair contempory for example this style with the heart shape is Elizabethan but with the colours in the hair and the full fringe make it more modern I also love the placement of the hair accessorise it emphases the shape of the heart and the contrast with one side of the heart and fringe being natural hair colour and the other having the colour through it.
Another look from the Chanel cat walk that incorporates heart shaped hair is

Similar to the first image but I feel the blonde emphases it more which shows me that I have to consider the hair colour during making my design. I love the hair accessories at the back if the hair and the pastel colours making it feel more contempory as pastel hair has become fashionable recently.
Another designer that I feel takes a lot of inspiration from the Elizabethan era is vivienne Westwood throughout her catwalks you can see inspiration from Queen Elizabeth for heart shape hair I've found this image
The whole design screams elizabethan to me from the ruffles on the collar to the hair colour then the heart shaped hair style with the high forehead I also like the the messy appearance of the hair making it feel more modern.
Portraits are the only way we get to have an idea of what they actually looked like as you can see here the high fore head frizzy looking hair and then curls coming from the back
Rounded shaped padding
 Same
technique with the heart shape although this time I placed the padding in the
center I platted a long strand of hair in a basic three strand plat doubled it
up then pinned my padding to it then back combed a piece of hair over the top
over it and used the excess hair to cover up the rest.
Same
technique with the heart shape although this time I placed the padding in the
center I platted a long strand of hair in a basic three strand plat doubled it
up then pinned my padding to it then back combed a piece of hair over the top
over it and used the excess hair to cover up the rest.
 Im really pleased with this as the first test run for my design I feel my partner did really well in portraying what I wanted Only few aspects I feel that needed to be perfected more are making sure the mow hawk part is equal each side and that the french platt is more secure as some parts were falling out but for the first time going through it I'm more that happy just realise now that there are a few things to touch up on for the final timed assessment.


 for this I was thinking about creating a padded round shape for the front with plats coming front the front going over the padded hair and leading off into the back I wanted to do a three strand platt look at the front but after alot of consideration I feel that I can expand and create a more interesting and exciting look for my final design although I still do like the idea of this design

 I was really inspired by Chanels catwalk by the hair stylist

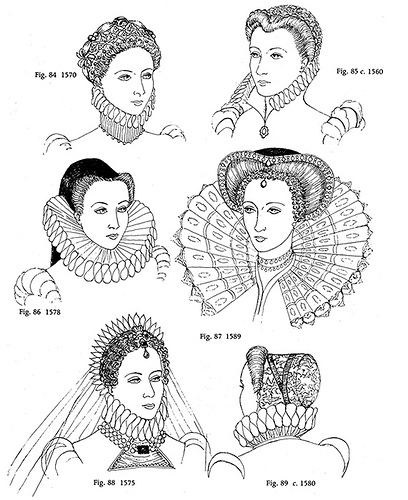


 As you can see from this portrait of Elizabeth her hair has a slight wave/crimp to it and it is but up into a heart shape in comparison to the modern versions above with their hair down as in Elizabethan times hair down would indicate your a virgin 'pure' on the 15th of january 1559 Queen Elizabeth's coronation took place with her hair long and wavey/crimped down still off the face emphasizing the forehead.


